Hello again, everone! I hope you are all well and safe out there during these strange times. To cheer up your day here is another entry of my 3D printing journal.
Returning back to the figurines that I printed for my mentor Martin Punchev for the exhibition of his students works from the Character design course at Additive days 2020 conference. Next one in the second batch was a model of one very brave beetle warrior modeled by Mihail Topalov.
Settings:
Settings:


Settings for the body:


Returning back to the figurines that I printed for my mentor Martin Punchev for the exhibition of his students works from the Character design course at Additive days 2020 conference. Next one in the second batch was a model of one very brave beetle warrior modeled by Mihail Topalov.
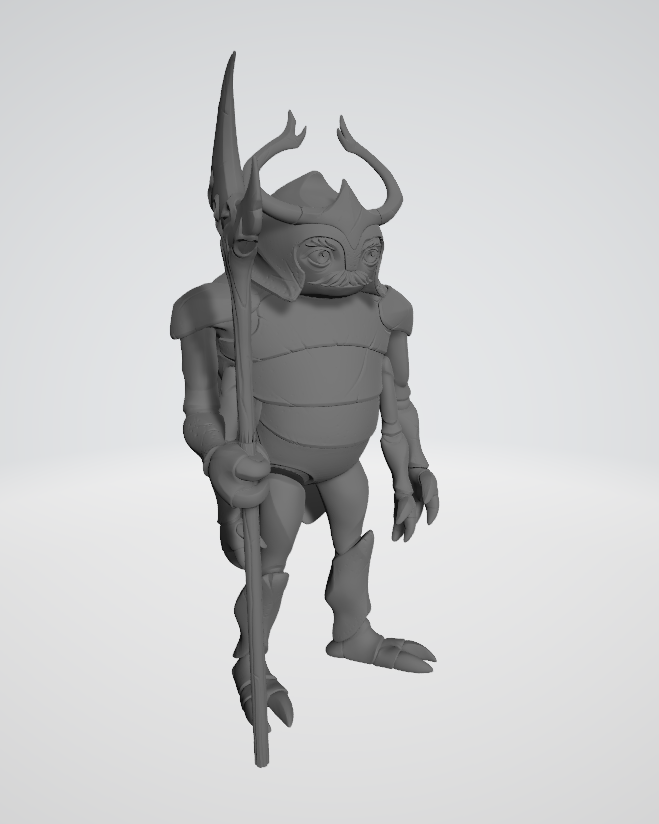 |
| Beetle warrior by Mihail Topalov |
I will tell you a secret - this is one of my top favorites <3.
Model analysis
As you can see here we have a lot of small and frail parts like the antennas of the beetle and his weapon. My mentor Martin told me to pay extra attention to them. Also we have two sets of arms and one set of hands, one set of legs and feet, one head, body and wings. A lot of parts,huh? ;)
Following the briefing the head should be more detailed as well as the top of the weapon. All other parts can use more draft settings. The hardest and time consuming to print would be the head, wings and body. Supports will be needed on most of the parts except for the feet.
The final size should be around 15cm height. Here you can see a screenshot of the model separated in different parts:
 |
| The model separated in 3Ds Max |
In 3Ds Max I scaled the model up to 2000% which in Cura is 148mm = 14,8 cm - roughly 15 cm. We are inside the height limit. Again Martin did great job making the model easy to be assembled after print. Feet will be glued to the legs, staff to the hand and it's bottom part, one set of hands to the arms and antennas will be glued to the helmet. Wings will be glued to the back. The others will go to their respective holes in the body :D.
Slicing in Cura
Here comes the fun part! I have to slice and print 17 objects in total!! It kinda took me more than one week to do all of them. Of course I am not going to describe what I did for all 17, so dont'worry. I will mention only the ones that made an impression.
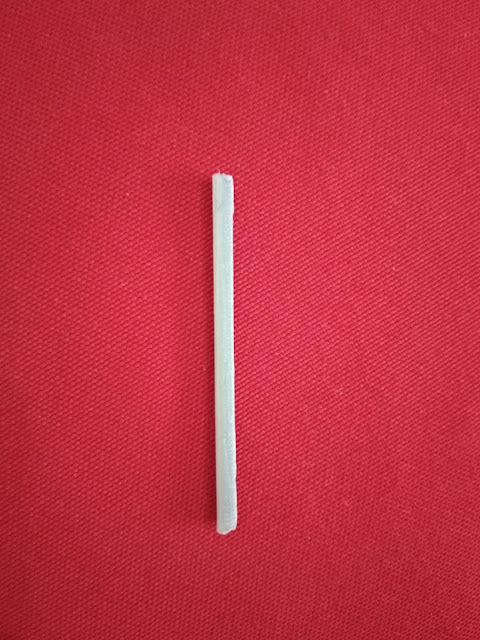
Let's start with the small parts like the antennas for example:
 |
| The beetle's antennas in Cura |
You will ask "What's so special about those? Aren't they like easy to print?" and I will answer yes. At first glance there should be no problems in printing those, but by the law of Murphy the easiest things are the hardest. After five failed attempts, the sixth one worked by some kind of miracle! What I learned later is that little things should be printed with the 0.25mm nozzle (or smaller) which will give a better result. Here are the lucky settings:
- Layer height - 0.05mm
- Infill - Grid pattern, 100%
- Supports - Touching buildplate, Density - 80%, Pattern - Grid, Support Z distance - 0.2mm, Support angle - 20
°
- Buildplate adhesion - Brim
- Nozzle diameter - 0.4mm
- Time taken - 15 minutes
Next up are a pair of arms. From the previous model of the Robo-cat I understood how to work properly with support density. Higher density value results in better overhangs and the fillament will be spread more evenly on the support. The damage on the model will be reduced. On the opposite the supports will be harder to remove and the print time will be increased.
 |
| Pair of arms in Cura |
- Layer height - 0.05mm
- Infill - Grid pattern, 80%
- Supports - Touching buildplate, Density - 80%, Pattern - Grid, Support Z distance - 0.2mm
- Buildplate adhesion - None
- Nozzle diameter - 0.4mm
- Time taken - 3 hours and 42 minutes
The top part of the staff is also interesting. Since it has details and I wanted to show them as better as I can.
 |
| Top part of the staff in Cura |
Settings:
- Layer height - 0.05mm
- Infill - Grid pattern, 100%
- Supports - Touching buildplate, Density - 80%, Pattern - Grid, Support Z distance - 0.2mm, Support angle - 20
°
- Buildplate adhesion - Brim, Brim width - 3
- Nozzle diameter - 0.4mm
- Time taken - 2 hours
The head of the beetle was very challenging to print. The first try just failed miserably as you can see on the pictures:
 |


What a mess, huh? :D Moral from this story - guys, be cautious with the support density! Choose carefully the pattern and the percentage of the infill rate of the supports! Here it's 80% with grid pattern. The result was horrible... Not even the Dremel could remove this mountain of supports... Four hours of printing went down the drain. I can't send such abomination to my client, right?
So on the next day first thing in the morning - reslice the model!
 |
| The head of the beetle in Cura |
Settings:
- Layer height - 0.12mm
- Infill - Gyroid pattern, 18%
- Supports - Touching buildplate, Density - 40%, Pattern - Concentric, Support Z distance - 0.3mm
- Buildplate adhesion - None
- Nozzle diameter - 0.4mm
- Time taken - 2 hours 12 minutes
This was the only time where I used the concentric circles pattern in the support section. The print time was reduced by 2 hours and it was very easy to remove them! I am also sharing a small video from the printing:
To put and end to this section here are the body and the wings of our beetle warrior sliced in Cura. At least these two didn't give me headaches and the printing went fine wihtout any incidents.
 |
| The body of the beetle in Cura |
 |
| The wings of the beetle in Cura |
Here the damages of the supports won't be visible because the wings will cover the back. Settings are as follows:
- Layer height - 0.15mm
- Infill - Gyroid pattern, 20%
- Supports - Touching buildplate, Density - 80%, Pattern - Grid, Support Z distance - 0.2mm
- Buildplate adhesion - Brim
- Nozzle diameter - 0.4mm
- Time taken - 3 hours 48 minutes
Settings for the wings:
- Layer height - 0.12mm
- Infill - Lines pattern, 50%
- Supports - Touching buildplate, Density - 50%, Pattern - Zig Zag, Support Z distance - 0.3mm
- Buildplate adhesion - Brim
- Nozzle diameter - 0.4mm
- Time taken - 4 hours
This concludes the slicing section. What we have learned from here:
- small and frail parts should have high infill percentage (80%-100%)
- use the support density option carefully
- infill and support patterns matter
- small things should be printed with the small diameter nozzle (0.25mm and so on), and big things with the big diameter nozzle (0.4 mm, 0.6mm, 0.8mm)
Now lets see what happened after the printing...
Post print


 |
| Duct tape to the rescue! |
Trust me, I am an engineer! Duct tape is the answer to everything! :D
I put it there because the hole in the body was too wide. The big parts turned out perfect as well as the small ones! Even the staff has those tiny little details! When I saw the beetle assembled I thought that it had something to tell me, dawwww ^_^. Cute little fella! <3
Hope that you enjoyed reading this post, if you made it this far that is! :)
On the next episode I will be talking about how I printed one chonky turtle :3.
Have a nice day and stay safe!
Коментари
Публикуване на коментар