Hello, dear readers!
Welcome to another episode of Vili's bizarre 3D printing adventures! Today I am going to tell you the story of one 3D printed Robo-cat!
It was the award of a challenge me and the other students accepted as part of the
3Ds Max course at
CGZEN. Whoever creates the best looking cat will receive a 3D printed model of it. Strangely enough I was given the honor to print the kitty! The lucky winner was Stanislava Zahova and this is her Robo-cat:
 |
| Robo-cat by Stanislava Zahova |
Isn't it just cute? :3
Model analysis
We can divide the parts in two groups - with and without supports. The head, tail and legs clearly need to be supported, while the paws, neck, body, torso and back won't need any supports at all.
In terms of resolution this model can use the faster settings since there aren't much details on it.
The cat needed to be scaled just a little bit, not like the previous model we discussed
here. The final size was around 12-13 cm high. Next picture shows the separated model:
 |
| The separated model |
As you can see Martin's set up of the model allows the legs, paws and head to be moved freely. The tail can also be detached. The neck, torso,body and back parts will be glued together. In the end we have to print 14 parts in total!
Slicing in Cura
Something I haven't talked about in the previous article was the right placing of the parts on the buildplate. This is also one very important step in preparing the models for 3D printing. Supports can be very harming and the objects need to be placed in such way to hide and minimize the damages. Of course, not every time this is possible but with some tweaks in the settings things can turn out really nice.
If by any chance your printer has two nozzles you can feed the second one with PVA (Polyvinyl Alcohol) filament which can disperse in simple tap water. This makes the removing of the supports a lot easier. In my case I have only one nozzle and playing with the support settings is vital after printing. Using pliers will help removing the supports. Careful not to damage the model while you are doing this!
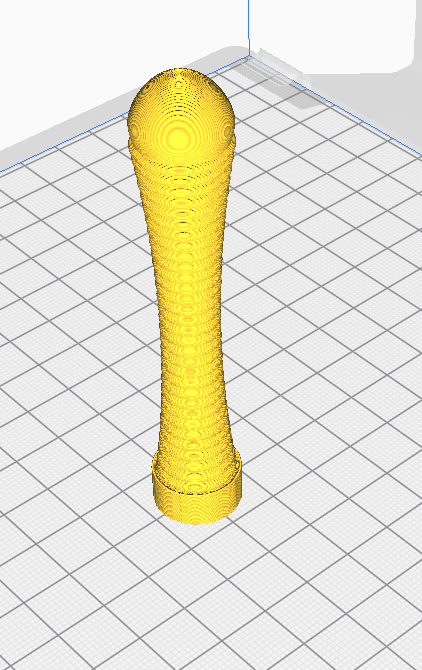
 |
| Back legs sliced in Cura |
The front and back legs are the same in terms of design so I took a screenshot only of the back pair. This is a stable positioning. The printer will first print the circle of the cylinder and the grid of the supports. In this way the important upper part will be preserved during printing. The bottom one will be damaged by the supports, but it is not going to be visible.
Settings:
- Layer height - 0.15mm
- Infill - Grid pattern, 18%
- Supports - Touching buildplate, Density - 50%, Pattern - Grid, Support Z distance - 0.3mm
- Buildplate adhesion - None
- Nozzle diameter - 0.4mm
- Time taken - roughly 4 hours in total (2 hours for each)
The Support Z distance setting in the Support group in Cura is the distance from top/bottom of the support structure to the print. This setting is very important when you have to remove the supports after printing. Personally I use 0.2mm and 0.3mm, but mostly 0.3mm.
Here are more examples:
 |
| The tail sliced |
 |
| The head sliced |
 |
| Gyroid infill pattern |
Settings are pretty much the same for the other parts. For the head I used the Gyroid pattern. It gives strength and speed during printing. Here the Infill density is 18%. It took me around 4 hours to print it!
 |
| The sliced body |
 |
| Sliced the back part |
 |
| Sliced paws |
The neck and the body are the same in structure. Same goes for the torso and back of the cat. For the paws I decided to print all four of them together.
Okay, slicing is done! Lets see what we have printed so far
Post print
 |
| Back leg, back and tail |
The first layer of the back part looks fuzzy. That's because of the bad placement on the build plate during the slicing stage. Only 70% of the first layer was printed. The fuzzy part is the second layer. I am surprised how it managed to stay on the buildplate without peeling off, hmm...
 |
| The tail printed |
 |
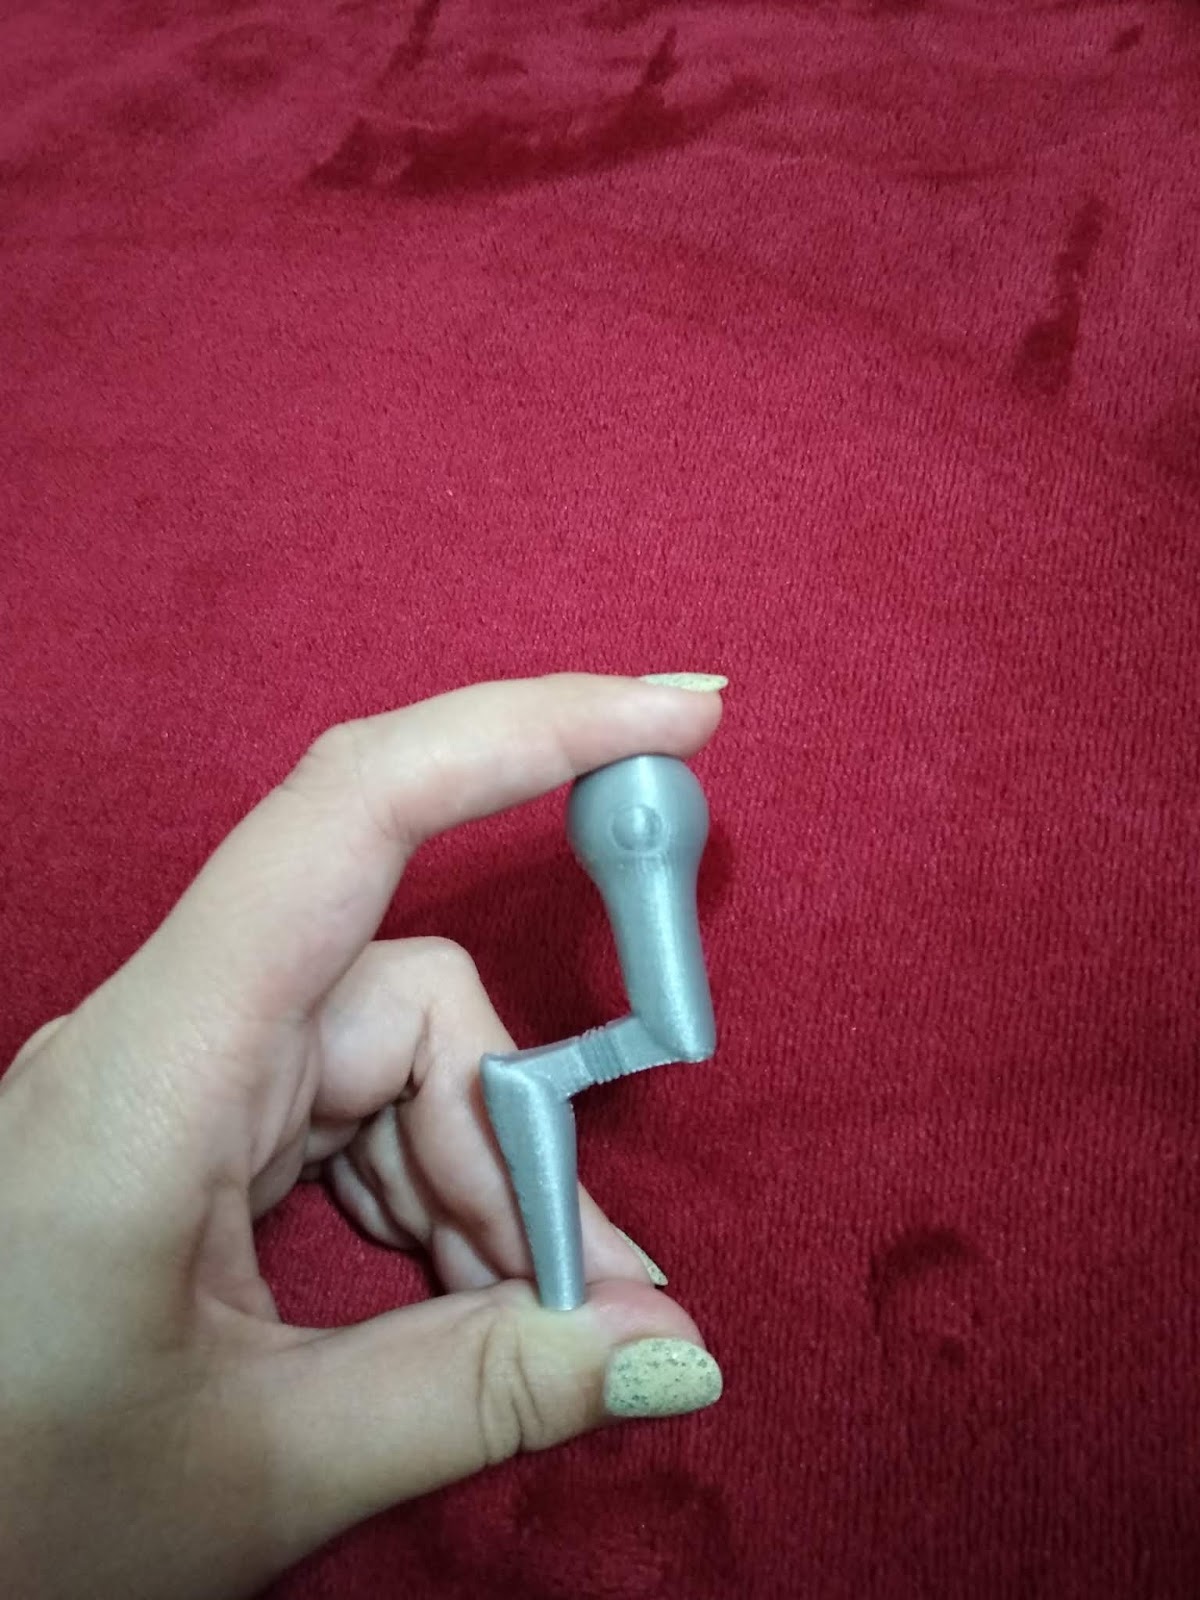
| One printed leg |
 |
| The printed back side |
 |
| Body of the cat |
 |
| Assembling in progress... |
 |
| The head printed |
 |
| Cat: I wish I had a head or something... |
I used simple tape to test how it will look like before gluing the parts.
Overall the kitty turned out simply great! Here are some more pictures after assembling:
I am also preparing for printing my own version of the robo-cat. It just needs to be redone a bit. Hope to fix it soon so I can print and show it here.
Thank you for reading!


Коментари
Публикуване на коментар